Understanding Acrylic Sheets
What Are Acrylic Sheets?
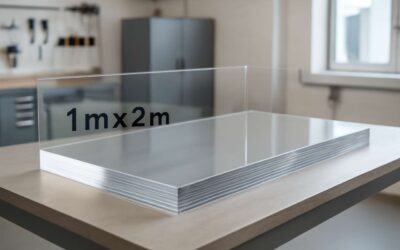
Acrylic sheets are often underestimated in their versatility, yet they hold a silent power in transforming spaces and ideas. When properly tailored to size, these sheets become more than just a material—they embody a blank canvas for innovation. Acrylic sheet to size isn’t merely about cutting; it’s about sculpting potential, understanding that each dimension shapes the narrative of your project.
What makes acrylic sheets truly remarkable is their clarity and strength. They rival glass but with a resilience that makes them ideal for countless applications—from art installations to commercial signage. For those seeking a seamless blend of durability and aesthetics, acrylic sheet to size offers an unmatched solution. The process requires precision and an understanding of the material’s properties, ensuring that every cut enhances its inherent qualities rather than diminishes them.
Common Uses of Acrylic Sheets
Acrylic sheets are more than just versatile materials; they are the backbone of many innovative projects across South Africa. Their common uses span from protective barriers in retail spaces to eye-catching displays in art galleries. When you opt for acrylic sheet to size, you’re tailoring a product that fits precisely your needs, reducing waste and maximizing efficiency.
This material’s clarity and durability make it a popular choice for a variety of applications. For instance, commercial signage benefits from the transparency and resilience of acrylic sheets to size, ensuring long-lasting visual impact. Similarly, acrylic sheet to size is frequently used in the creation of custom lighting fixtures and display cases, where precision is key.
In fact, the adaptability of acrylic sheet to size extends to more specialized industries. It’s often employed in the fabrication of protective screens, windows, or even furniture. By customizing the dimensions, manufacturers and designers unlock the full potential of acrylic sheets, turning simple sheets into tailored solutions that meet exact specifications.
Advantages of Acrylic Over Glass
Acrylic sheets possess an almost mythical allure in the realm of modern fabrication, offering advantages that often surpass traditional glass. Their lightweight nature is nothing short of enchanting—imagine creating grand displays or protective barriers without the burden of excessive weight. This makes acrylic sheet to size a preferred choice for intricate projects where precision and ease of handling are paramount.
The true marvel lies in acrylic’s resilience. Unlike glass, which can shatter into jagged shards, acrylic remains remarkably tough, resisting impacts and scratches. This durability elevates it as the material of choice for high-traffic environments and safety-conscious applications. For those seeking clarity that rivals crystal, acrylic sheet to size provides a pristine, transparent surface that is easy to customize. Its versatility is further highlighted by its ability to be fabricated into complex shapes, creating a seamless blend of function and artistry.
Importance of Accurate Measurement for Acrylic Sheet Cutting
Why Precise Measurement Matters
In the realm of craftsmanship and innovation, precision transforms mere materials into works of art. When it comes to acrylic sheet to size, the importance of accurate measurement cannot be overstated—it’s the delicate thread that weaves functionality with finesse. A slight miscalculation in dimensions can ripple into costly errors, affecting the structural integrity and visual harmony of your project.
Imagine attempting to fit a piece of enchanted glass into a frame only to discover it’s slightly askew—disrupting the entire aesthetic. That’s why meticulous measurement is essential when cutting acrylic sheet to size. It ensures each piece aligns perfectly, whether you’re creating a stunning display case or a modern architectural feature. For optimal results, consider these key factors:
- Measuring tape precision
- Proper marking techniques
- Using calibrated cutting tools
By prioritizing accurate measurement, you embrace the true potential of acrylic sheets—delivering seamless, professional finishes that captivate and endure. After all, in a world where details define excellence, the mastery of acrylic sheet to size becomes an art all its own.
Risks of Incorrect Sizing
Accurate measurement is the backbone of successful acrylic sheet to size projects. A small misstep in measuring can lead to significant setbacks, from wasted material to compromised structural integrity. In the world of acrylic sheet to size, precision isn’t just a recommendation — it’s an absolute necessity.
Incorrect sizing can result in gaps, weak points, or the inability to fit the acrylic sheet into its designated space. These errors often lead to costly rework and delays. For example, an overly large cut might force you to start over, while an undersized piece could compromise your design’s stability.
To avoid such pitfalls, pay close attention to measurement details, use calibrated tools, and double-check your markings. When every millimeter counts, meticulous measurement transforms your project from a gamble into a guarantee of quality.
Factors Influencing Measurement Accuracy
In a world where precision can make or break your project, the importance of accurate measurement for acrylic sheet to size cannot be overstated. An incorrectly measured acrylic sheet isn’t just a minor hiccup; it’s a potential disaster that can lead to wasted material, delays, and a hefty bill. Think of it as trying to fit a square peg into a round hole—only the peg is your carefully selected acrylic sheet, and the hole? Well, that’s your project’s specifications.
Factors influencing measurement accuracy include the quality of your tools, environmental conditions, and even human error. For example, using a rusty tape measure or measuring in a drafty workshop can introduce subtle errors that cascade into major issues during cutting. To mitigate these risks, consider employing calibrated tools and double-checking your markings—because when it comes to acrylic sheet to size, every millimeter matters more than you might think.
Tools and Equipment for Customizing Acrylic Sheets
Measuring Tools
Getting the perfect cut on an acrylic sheet to size requires more than just a steady hand; it demands the right tools and equipment. Precision measuring tools are essential—think digital calipers or a reliable steel ruler—to ensure every dimension is exact. Without accurate measurements, even the slightest miscalculation can lead to costly mistakes or wasted material.
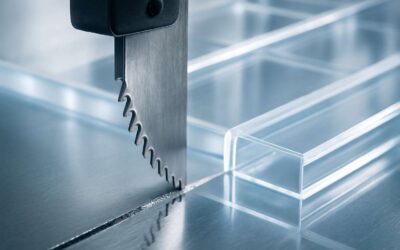
For cutting, a fine-tooth saw, such as a plastic or acrylic-specific saw, is recommended to prevent cracking or chipping. When marking the acrylic sheet to size, use a non-permanent marker or masking tape coupled with a straightedge for clean lines. Safety should never be overlooked—wear protective gloves and goggles to shield against sharp edges and flying debris.
Here’s a quick overview of essential measuring tools for your project:
- Digital calipers
- Steel rulers or straightedges
- Measuring tapes
Investing in quality tools ensures your acrylic sheet to size is precise, safe, and efficient. Remember, the difference between a professional finish and a flawed outcome often comes down to the equipment used during measurement and cutting.
Cutting Tools
In the realm of crafting and engineering, the difference between an impeccable finish and a disheartening flaw often hinges on the tools wielded in the process. When customizing an acrylic sheet to size, every cut must be precise, every measurement unwavering. A masterful cut reveals itself through the harmony of quality tools and skilled technique, transforming a simple sheet into a work of art or a functional masterpiece.
To achieve this, the right tools are essential. Digital calipers provide unparalleled accuracy, allowing for meticulous measurement that leaves no room for error. Steel rulers or straightedges serve as the backbone of your marking process, ensuring crisp, clean lines that guide your cuts with unwavering confidence. For those seeking versatility, measuring tapes prove invaluable—especially when working with larger sheets or irregular surfaces.
When it comes to cutting, a fine-tooth saw designed specifically for acrylic or plastics is paramount. These specialized saws help prevent cracking or chipping—common pitfalls when using inappropriate blades. Remember, safety is a virtue! Protective gloves and goggles safeguard against sharp edges and flying debris, making your workshop not just productive but also secure.
Safety Equipment
Precision is everything when it comes to customizing an acrylic sheet to size—every millimeter counts in creating a seamless finish or a flawless fit. To ensure your project stands out, investing in the right safety equipment is as vital as choosing the correct tools. Protecting yourself from sharp edges and flying debris isn’t just sensible; it’s essential. Gloves made from cut-resistant material shield your hands from jagged edges, while safety goggles guard your eyes against tiny shards that can fly unexpectedly during the cutting process.
Equipping your workspace with the proper safety gear transforms a potentially hazardous task into a smooth, controlled activity. For added reassurance, consider using a dust mask if working in a confined space or with materials that produce fine particles. Remember, safety isn’t an afterthought—it’s the foundation of a successful acrylic sheet to size project. When handling acrylic sheets, always prioritize protective equipment to keep accidents at bay and your focus sharp. After all, a clean cut begins with a safe workspace.
Step-by-Step Guide to Cutting Acrylic Sheet to Size
Preparing Your Workspace
Transforming a raw sheet of acrylic into a bespoke masterpiece begins with a meticulous approach—one that transforms mere material into a precise work of art. When preparing your workspace for acrylic sheet to size, clarity and order are your most vital allies. Imagine a realm where every tool and measurement is perfectly aligned, ready to carve out your vision with elegance and finesse. This is the foundation of successful acrylic sheet to size projects, where precision reigns supreme.
Before you start, ensure your surface is clean, flat, and free of debris. A cluttered or uneven workspace can lead to inaccuracies that compromise your entire project. To streamline the process, gather your cutting tools, safety equipment, and measuring devices beforehand. Remember, the integrity of your acrylic sheet to size hinges on your environment—an organized, well-prepared space ensures smooth execution and flawless results.
- Clear your work surface of any obstructions.
- Set up proper lighting for better visibility.
- Position your tools within easy reach.
Measuring and Marking the Acrylic
Embarking on the journey of acrylic sheet to size is akin to orchestrating a delicate ballet—precision and patience are your most charming partners. The first step in this elegant dance involves meticulous measuring and marking, for even the tiniest misstep can ripple into a cascade of inaccuracies. It’s a process that demands not just the right tools but a keen eye for detail, ensuring your acrylic sheet to size aligns perfectly with your envisioned masterpiece.
Start by carefully laying your acrylic sheet on a flat, stable surface—nothing less than flawless will do. Using a high-quality measuring tape or ruler, record your dimensions with deliberate care. To elevate accuracy, employ a fine-tipped permanent marker or a wax pencil for marking, ensuring your lines are clear but easily removable if needed. For added precision, consider using a square or a straightedge to draw your cut lines, guiding your hand like a seasoned maestro. Remember, every millimeter counts in the art of acrylic sheet to size, especially when your project demands a pristine finish.
Cutting Techniques for Precision
Achieving a perfect acrylic sheet to size is less an art and more a refined craft—requiring patience, precision, and a dash of finesse. When you’re ready to cut your acrylic sheet to size, don’t rush the process; instead, embrace the slow dance of meticulous measurement and careful execution. It’s the kind of task that rewards the diligent with a flawless finish and a sense of quiet triumph.
Step one involves selecting the appropriate cutting technique for your project—be it score and snap, saw cutting, or laser refinement. Each method demands a different level of control, but all share a common principle: accuracy. For straight, clean edges, a fine-toothed saw or a scoring blade paired with a straightedge often does the trick best. Remember, a steady hand and a well-placed guide can make all the difference. In fact, employing an ordered process—such as marking your acrylic sheet to size with precision tools—ensures a seamless transition from measurement to cut.
- Secure your acrylic sheet firmly to prevent slipping
- Mark your cut lines clearly with a permanent marker or wax pencil
- Use a straightedge or square for guiding your cutting instrument
- Apply steady, even pressure to avoid cracks or chipping
Choosing the right cutting technique for your acrylic sheet to size isn’t just about ease—it’s about safeguarding the integrity of the material. Whether you opt for scoring, sawing, or laser precision, understanding each method’s nuances can significantly elevate your final product. The goal? To master the art of acrylic sheet to size while maintaining the pristine clarity and smooth edges that define a truly professional finish.
Post-Cut Finishing and Sanding
Once your acrylic sheet to size has been carefully cut, the journey doesn’t end there. The final step involves post-cut finishing and sanding, which transforms rough edges into smooth, professional-looking surfaces. This process may seem delicate, but it’s the secret to ensuring your acrylic sheet to size looks pristine and functions perfectly in its intended application.
Start by selecting the right grit of sandpaper—coarse enough to remove any burrs yet fine enough to leave a polished edge. Gently sand along the cut edge, maintaining a consistent motion to prevent uneven surfaces. For a truly flawless finish, consider using a polishing compound designed specifically for acrylic, which can add a clear, glossy sheen. The result? An acrylic sheet to size that not only fits perfectly but also radiates clarity and craftsmanship.
- Begin with a light pass of medium-grit sandpaper to smooth out any imperfections.
- Progress to a finer grit for a polished, smooth edge.
- Finish with a polishing compound or acrylic-specific polish for maximum clarity.
As you work through the finishing process, patience is your greatest ally. Each gentle stroke brings you closer to a seamless, professional finish—celebrating the artistry of working with acrylic sheets to size. When done right, this finishing touch elevates your project from ordinary to extraordinary, capturing the true beauty of this versatile material.
Choosing the Right Cutting Method Based on Thickness
Thin Acrylic Sheets
When selecting a cutting method for acrylic sheet to size, understanding the thickness of your material is paramount. Thin acrylic sheets, typically less than 3mm, require a delicate touch—often best suited to scoring and snapping techniques that preserve clarity and minimize stress marks. Conversely, thicker sheets demand more robust machinery, such as CNC routers or laser cutters, to achieve precision without cracking or warping. The key is to match your approach to the sheet’s resilience, ensuring the integrity of your acrylic remains intact throughout the process.
For thinner acrylic sheets, a simple scoring tool paired with a straight edge can produce remarkably clean cuts, especially when combined with a controlled snapping motion. Thicker sheets, however, often benefit from the power of laser cutting or high-speed routing, which slices through with surgical accuracy. The choice of method not only impacts the finished quality but also influences the efficiency of your project. Recognizing these nuances guarantees an acrylic sheet to size that’s both perfect in dimension and flawless in appearance.
Medium Thickness Sheets
Choosing the right cutting method based on the thickness of your acrylic sheet to size is a dance of precision and patience. Medium thickness sheets, typically ranging from 3mm to 10mm, embody a delicate balance—robust enough to withstand powerful tools yet sensitive to the nuances of accurate cutting. For these, laser cutters and CNC routers become artisans’ tools, slicing through with a finesse that preserves clarity and structural integrity.
- Laser cutting offers unparalleled precision and a smooth edge, ideal for detailed designs.
- High-speed routing provides versatility, especially for intricate shapes or larger sheets.
In contrast, sheets thinner than 3mm respond beautifully to scoring and snapping, a testament to the material’s innate flexibility. When it comes to acrylic sheet to size, understanding these distinctions transforms a mundane task into an art form—ensuring that each cut celebrates the material’s natural elegance while maintaining its resilience.
Thick Acrylic Sheets
When it comes to tailoring an acrylic sheet to size, selecting the optimal cutting method is akin to choosing the right spell for a specific enchantment. The thickness of your acrylic sheet—particularly medium thickness sheets—dictates which technique will unlock its true potential. For sheets ranging from 3mm to 10mm, precision becomes paramount, and the tools used must dance delicately across the material’s surface.
Laser cutters and CNC routers stand as the artisans’ preferred methods for medium thickness sheets. Laser cutting offers unparalleled accuracy, creating smooth, glass-like edges perfect for detailed designs. Conversely, high-speed routing provides versatility, especially effective for shaping intricate patterns or larger acrylic sheets. To ensure flawless results, consider these factors when choosing your approach:
- Desired edge quality
- Complexity of the design
- Size of the acrylic sheet to size
Understanding these distinctions not only elevates the craft but also preserves the clarity and structural integrity of your acrylic sheet to size, transforming a simple task into a masterful act of creation.
Tips for Achieving a Smooth, Clean Edge
Using Proper Cutting Techniques
Achieving a smooth, clean edge when cutting acrylic sheet to size is both an art and a science—an act that demands patience, precision, and a deep respect for the material’s fragile beauty. When done correctly, the result is a seamless, professional finish that elevates any project, whether for intricate displays or architectural accents. The secret lies in understanding the nuances of proper cutting techniques.
One effective method involves scoring the acrylic sheet to size with a sharp utility knife or a specialized acrylic cutter, applying consistent pressure along a straight edge. For thicker sheets, a fine-tooth saw or a CNC router can ensure precision without causing stress fractures. To prevent chipping or cracking, it’s crucial to support the material fully and maintain steady, even pressure.
For optimal results, consider the following approach:
- Use a fine-tooth saw or a scoring tool designed for acrylic.
- Secure the sheet firmly to avoid shifting during cutting.
- Apply masking tape along the cut line to minimize chipping.
- Cut slowly and steadily, avoiding sudden movements that could distort the edge.
Mastering these techniques transforms a simple cut into a work of craftsmanship—making your acrylic sheet to size not just a task, but an act of creation.
Finishing Tools and Methods
Achieving a flawless finish when customizing an acrylic sheet to size is an art that combines meticulous technique and an eye for detail. The secret to a smooth, clean edge lies in selecting the right finishing tools and mastering their use. Sharp, high-quality blades—whether they’re fine-tooth saw blades or precision scoring tools—are essential for clean cuts that resist chipping and cracking. Ensuring your workspace is fully supported minimizes stress on the acrylic, preserving its delicate beauty.
For an elegant, polished edge, consider using a combination of tools. A dedicated acrylic cutter paired with a sanding block or fine-grit abrasive pad can refine the cut surface beautifully. When working with acrylic sheet to size, it’s wise to finish the edges by gentle sanding or flame polishing, which can elevate the overall appearance of your project. Remember, patience and steady hands transform rough cuts into works of craftsmanship, making your acrylic sheet to size not just functional, but visually captivating.
Incorporating masking tape along the cut line is a subtle yet impactful step—this simple layer can dramatically reduce chipping and ensure a pristine finish. Whether you’re working with thin acrylic sheets or more substantial pieces, these finishing techniques elevate your craftsmanship to an art form, turning a basic cut into a seamless extension of your creative vision.
Common Mistakes to Avoid
In the shadowed corridors of craftsmanship, the pursuit of a flawless acrylic sheet to size is a dance with precision and patience. A single misstep—a rough cut or hurried finish—can shatter the delicate elegance that acrylic promises. To achieve a smooth, clean edge, one must wield the right tools with a steady hand and unwavering focus. The subtle beauty of acrylic is revealed through meticulous finishing, where even the smallest imperfections become glaring faults.
Common mistakes often lurk in haste or neglect. Overly dull blades tend to chip the acrylic, leaving jagged edges that mar the visual harmony. Failing to support the sheet adequately can induce stress fractures, turning a promising project into a fractured relic. Remember, the secret lies not just in the tools but in the gentle, deliberate techniques—like using masking tape along the cut line to prevent chipping. This simple yet effective step can make all the difference, transforming a rough cut into a pristine masterpiece of craftsmanship.
To elevate your work, consider employing a combination of finishing methods—sanding with fine-grit abrasive pads or flame polishing. These techniques refine the edges, giving your acrylic sheet to size a polished, professional appearance. Patience is the unseen virtue in this process; it turns a basic cut into an artful extension of your creative vision. In the shadows of these details, mastery is born, ensuring your acrylic sheets not only serve their purpose but also captivate with their haunting beauty.
Professional vs DIY Acrylic Sheet Cutting Services
When to Consider Professional Services
In a world where precision often determines the success of a project, knowing when to opt for professional acrylic sheet to size services can make all the difference. While DIY cutting may seem tempting for minor tasks, it’s crucial to recognize the limits of amateur skills. Experienced professionals bring a mastery of tools and techniques that guarantee clean, accurate cuts—something that can be elusive to those without specialized training.
Choosing professional services for acrylic sheet to size ensures flawless results, especially for complex shapes or thick acrylic sheets that demand precision. It’s worth considering the safety and efficiency benefits too; professionals minimize risks associated with blade slips and improper handling. When your project calls for a high standard of quality and durability, trusting experts to deliver is often the wisest choice.
Benefits of DIY Cutting
Opting for professional acrylic sheet to size services often means the difference between a flawless finish and a frustrating mishap. While DIY cutting can seem appealing—especially for small projects—it’s easy to underestimate the skill and precision required for a perfect cut. Amateur attempts may result in jagged edges or even cracked acrylic, which can compromise the integrity of your project.
However, there are benefits to DIY cutting that shouldn’t be overlooked. For instance, it allows for quick adjustments and immediate results without waiting for a service provider. If your project involves simple, thin acrylic sheets, a steady hand and the right tools can sometimes suffice.
- Cost savings
- Immediate gratification
But for larger or more complex acrylic sheet to size tasks, trusting professional services ensures accuracy, safety, and a polished finish that DIY methods often cannot achieve. When precision matters, the expertise of seasoned professionals becomes invaluable, especially in ensuring your project’s durability and aesthetic appeal.
Cost Comparison
When weighing the cost of acrylic sheet to size, the decision between professional services and DIY cutting can be quite revealing. Professional acrylic sheet to size services often come with a higher upfront price, but they deliver unmatched precision, ensuring your project’s durability and flawless appearance. The cost covers not only the cutting process but also the expertise, safety measures, and specialized equipment involved.
On the other hand, DIY cutting may seem more budget-friendly initially, especially for small or simple projects. However, hidden costs can quickly emerge—jagged edges, cracked acrylic, or even the need to redo work, which can escalate expenses unexpectedly. For larger or complex acrylic sheet to size jobs, the price difference becomes even more significant, making professional services a more economical choice in the long run.
Ultimately, the true cost isn’t just about the price tag—it’s about the quality, safety, and precision that professional acrylic sheet to size services provide, ensuring your project stands the test of time.
Maintenance and Handling of Custom-Sized Acrylic Sheets
Cleaning and Care Tips
Maintaining and handling custom-sized acrylic sheets requires a delicate touch and an eye for longevity. These versatile panels, renowned for their clarity and durability, demand proper cleaning to preserve their visual brilliance. Harsh chemicals or abrasive materials can mar their surface, so gentle cleaning with a soft cloth and mild soap is advisable. Regular dusting prevents buildup that can scratch the acrylic over time, ensuring it remains pristine and transparent.
When it comes to handling acrylic sheet to size, always remember that even slight impacts can result in cracks or chips. Supporting the sheet on a flat, padded surface minimizes stress during movement, and wearing gloves can prevent fingerprints and smudges. For those who prefer a meticulous approach, using a microfiber cloth and a specialized acrylic cleaner guarantees a streak-free finish. Adopting these care tips not only prolongs the life of your acrylic sheets but also maintains their aesthetic appeal, making every installation an expression of refined craftsmanship.
Storage Recommendations
Proper storage of custom-sized acrylic sheets is crucial to maintain their pristine condition and ensure longevity. Acrylic sheet to size should always be stored vertically in a dry, cool environment, away from direct sunlight and extreme temperatures. Flat stacking can cause warping or cracking over time, so consider using padded supports to prevent any undue stress. If you need to keep multiple sheets, place soft, non-abrasive barriers between them to avoid surface scratches.
When handling acrylic sheet to size, always prioritize safety and care. Supporting the sheet on a padded surface minimizes the risk of accidental breakage during transportation or installation. Wearing gloves is highly recommended to prevent fingerprints and smudges that can dull its clarity. For added protection, use specialized acrylic cleaning solutions and microfiber cloths, especially when moving or adjusting your sheets. Remember, a little extra caution now can save you costly repairs or replacements later.
Preventing Damage During Handling
Handling acrylic sheet to size is a delicate art, requiring both care and precision to preserve its flawless clarity. Imagine the sheet—a shimmering, translucent canvas—ready to transform your space. Yet, even the slightest mishandling can mar its surface or cause unexpected cracks. To prevent damage, always support acrylic sheet to size on a padded, stable surface. This not only cushions the sheet but also helps maintain its shape during transportation or installation.
When moving or adjusting acrylic sheets, wearing gloves is a simple yet vital step. The oils and dirt from your fingertips can dull the surface’s brilliance, undermining its visual impact. For extra safety and protection, consider using soft, non-abrasive barriers between multiple sheets; this averts surface scratches and warping over time.
- Never support acrylic sheet to size horizontally without proper padding.
- Use gentle, non-abrasive cleaning solutions for maintenance.
- Always handle with care to avoid accidental breakage.
In the realm of acrylic sheet to size, patience and mindfulness are your greatest allies—ensuring your investment remains pristine, vibrant, and enduring for years to come.
FAQs About Cutting Acrylic Sheet to Size
Can I Cut Acrylic at Home?
Many DIY enthusiasts and professionals alike wonder if they can cut acrylic sheet to size at home. The answer is yes, but it’s essential to approach the task with the right tools and techniques to ensure a clean, precise cut. Acrylic sheet to size is often tailored for custom projects, and doing it yourself can save both time and money—if done correctly.
However, cutting acrylic at home requires more than just a sharp blade. Proper safety equipment, such as gloves and eye protection, is vital to prevent injuries from sharp edges or flying debris. Using the right cutting tools, like a fine-tooth saw or a laser cutter for more intricate designs, makes all the difference in achieving a smooth finish. Remember, the key to a successful acrylic sheet to size project is patience and precision—rushing through can lead to cracks or uneven edges.
- Measure twice, cut once—accurate measurements are the foundation of a perfect acrylic sheet to size transformation.
- Use masking tape along the cut line to prevent chipping and keep your cut as clean as possible.
- Always cut on a stable surface with appropriate clamps to hold the acrylic sheet securely in place.
Many find that with the right preparation, cutting acrylic sheet to size at home is a rewarding experience that results in a professional finish. Whether for a small craft project or a larger installation, understanding the nuances of acrylic cutting can turn a simple task into a satisfying DIY achievement.
What Is the Best Tool for Cutting Acrylic?
FAQs About Cutting Acrylic Sheet to Size: What Is the Best Tool for Cutting Acrylic?
When seeking the perfect cut for your acrylic sheet to size, selecting the right tool can feel akin to wielding a magician’s wand—transforming raw material into a masterpiece with precision and ease. The best tool often depends on the complexity of your project and the thickness of the acrylic. For straight, clean cuts, a fine-tooth saw or a specialized acrylic cutter is highly effective, ensuring smooth edges and minimal chipping.
For intricate designs or detailed work, laser cutters or CNC machines are the artisans’ choices, offering unrivaled accuracy and finesse. Yet, for most DIY endeavors, a simple utility knife paired with a straight edge can suffice, provided you take your time and follow proper safety protocols. Choosing the right tool not only enhances the quality of your acrylic sheet to size but also preserves the integrity of your work, preventing cracks or fractures that can ruin your project’s aesthetic.
Ultimately, the best tool for cutting acrylic relies on a combination of your project’s scope and the thickness of the acrylic. Remember, patience and the right equipment are your allies in turning a plain sheet into a bespoke creation that stands the test of time and craftsmanship. Regardless of the method, safety remains paramount—always wear protective gear and secure your acrylic sheet firmly during the cutting process.
How Do I Measure Acrylic Accurately?
Accurate measurement is the silent architect of any successful acrylic sheet to size project. When precision is compromised, even by a fraction, the entire aesthetic and structural integrity of your creation can falter—cracks may appear, edges might chip, and the final product can fall far short of expectations. The key lies in understanding that measuring acrylic accurately involves more than just a ruler and an eye—it’s a meticulous process demanding patience and the right approach.
Begin by selecting tools designed for precision—such as a high-quality steel ruler, calipers, or a tape measure with clear graduations. When marking your acrylic sheet to size, always double-check your measurements, as errors tend to compound during cutting. To ensure unwavering accuracy, consider using a square or a straight edge, which acts as a guiding line that prevents deviations. Remember, the goal is to transfer your measurements onto the acrylic surface with clarity, avoiding any ambiguity that could lead to miscuts.
For large or complex projects, employing an
- inner measuring tape
- digital caliper
can enhance precision, especially when working with thicker acrylic sheets. These tools allow for finer control, which is vital when the slightest misalignment could compromise your desired acrylic sheet to size. Ultimately, taking the time to measure carefully and mark accurately transforms a potentially frustrating task into a seamless process—an essential step in turning raw acrylic into a polished, bespoke masterpiece.
How Do I Avoid Cracking or Chipping?
Cutting acrylic sheet to size can feel like threading a needle in a haystack—delicate, precise, and demanding a steady hand. One of the most common pitfalls is cracking or chipping during the process, which can ruin an otherwise perfect project. But fear not! With the right approach, you can master the art of clean cuts and flawless edges.
The secret lies in understanding how to avoid cracking or chipping when working with acrylic sheet to size. Using the correct tools—like a fine-tooth saw blade, a diamond-tipped cutting tool, or a specialized acrylic cutter—is essential. Always support the sheet thoroughly to prevent undue stress.
- Clamp the acrylic securely
- Use masking tape along the cut line
- Cut slowly and steadily
This combination helps distribute pressure evenly, reducing the risk of cracks.
Another tip is to score the acrylic sheet to size with a sharp utility knife or scoring tool, then snap it gently along the scored line. This method minimizes stress and produces a cleaner edge. Remember, patience is your best ally—rushing the cut often leads to unwanted chips or fractures. Whether you’re working with thin or thick acrylic, understanding these nuances ensures your project turns out just as envisioned, free of damage or imperfections.

0 Comments